Showing posts with label Warp Weighted Loom. Show all posts

Friday, July 6, 2018

Fabric for an Orkney Hood

I enjoy both weaving on a warp-weighted loom and tablet weaving. Looking for a new project I found information on the Orkney hood, an Iron or early Viking age hood with complex weaving and a double tablet woven trim with fringe. This intriguing garment had it all, so I set out to find more about it and setup to recreate a version for my wife. The fact that the cloth of the hood was woven in 2/2 herringbone twill made it extra interesting, since I have never woven this type of twill and there are few extant pieces using this type of weave aside from its use in leg wraps.


Historical background

The Orkney hood was found in 1876 in a peat bog in St. Andrew’s parish, Orkney. A detailed description of the original find was given by the experimental archeologist Jacqui Wood, who was commissioned to create an accurate reconstruction of the Orkney Hood by the National Museum of Scotland in 2002. The hood is a unique garment that combines a herringbone twill fabric for the hood with two tablet woven trims, one with fringe. The precise date of construction of the garment is unknown, but Audrey Henshall suggested that the hood was likely from the Iron or early Viking age. A more recent study comes to the same conclusion.

The whole garment is woolen, now a warm brown color with darker threads in the bands. The measurements of the hood are: middle forehead round to under chin 11 inch, point at crown to bottom of bands at back 19.5 inch, round shoulders 37.5 inch., length of fringe 11 to 12 inch; The hood is made up of three separate woven pieces. The cloth of the hood was a 2/2 herringbone twill weave with very erratic widths of the chevron stripes. The width ranged from 18 to 88 warp threads per stripe. The lower part of the hood consists of two tablet woven bands and the fringe. The upper band is 0.75 inch wide. It is hand sewn to the hood, the bottom edge is sewn to the upper edge of the lower band. The lower band is 2.75 inch wide, and from it hangs the fringe, which is an integral part of the band. The narrow, upper band consists of 23 threads of various color and thickness. The wide, lower band consists of 150 threads and required 50 tablets. It was woven with a mixture of light brown and dark brown threads. The fringe was formed from the weft of the lower band and thus an integral part of the band.

Reconstructed hood by Jacqui Wood.


Weaving the fabric

The current project only covers the weaving of the fabric for the hood; the tablet woven bands and assembly of the entire piece are a future project. The original hood is quite small and I had to enlarge all dimensions to make it fit my wife. Measuring required scaling all measurements with a factor of ca. 1.5, thus requiring a fabric of approximately 29 x 27 inch. Since this exceeded the width of my loom, I decided to weave a 13.5 inch wide strip of twice the length.

The reconstruction used single ply wool for the warp and the weft: a single thread for the weft and a double (unplied) thread for the warp. I setup the warp with 300 warp threads of store bought very loosely plied two-ply wool, which gave me a starting width of a little over 16 inch, enough wider to allow for the inevitable narrowing of the fabric during the first few inches of weaving and for shrinkage after washing. I unplied the same wool to get single ply thread for the weft. The chevron bands have a varying number of weft threads per band for a total number of picks of 392. This requires a weft count of a little over 13/inch or 5/cm, close to what I was getting in another project using the same wool. So even though I increased the size by about a factor 1.5, the total number of weft threads should end up being close to that of the extant piece. So I started weaving the fabric using the same sequence of herringbone bands as the original. After completing the entire sequence, the total length of the fabric was ca. 28 inch, very close to what was needed for the hood in the desired size. So I only added a single band of 24 picks to give a little margin for shrinkage. I then wove another complete sequence to get the other half of the fabric that I will need for the hood.

Creating the warp using a tablet woven starter band (left) and the finished heddles for 2/2 herringbone twill (right).


Tying on the loom weights (left) and the fully warped loom (right).


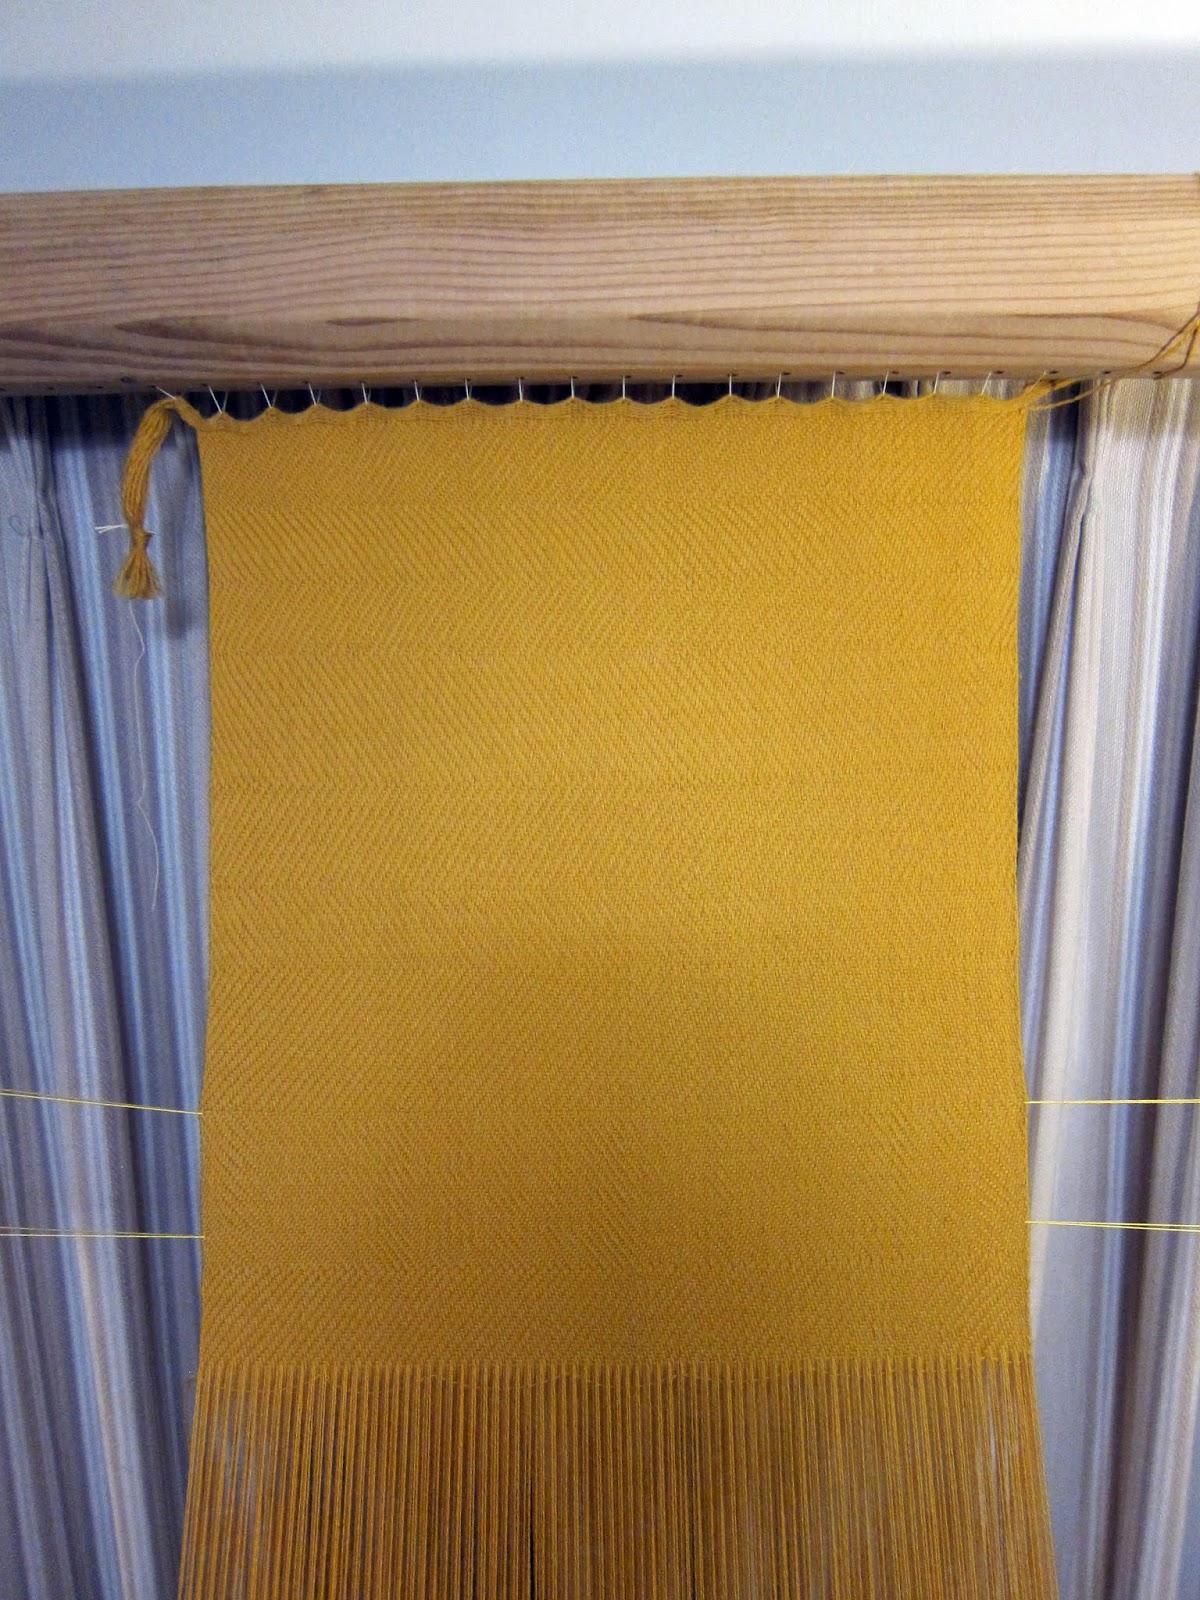
Close-up of the first inch of woven fabric.


Tying off the fringe at the end of the warp.


Washing and drying of the finished fabric.


Bibliography

Gabra-Sanders, T. (2001) The Orkney Hood, Re-Dated and Re-Considered, in Rogers, P. W., Jorgensen, L. B., and Rast-Eicher, A. (eds) The Roman Textile Industry and its Influence, Oxbow (Oxford).

Henshall, Audrey S. (1951-52) Early Textiles found in Scotland: Part One, Proceedings of the Society of Antiquaries of Scotland, Vol. 86.

Wood, Jacqui (2003) The Orkney Hood: an ancient re-cycled textile, in Downes, J. and Ritchie, A. (eds), Sea Change: Orkney and Northern Europe in the Later Iron Age ad 300-800 (Balgavies, Angus: The Pinkfoot Press), pp. 171-75
www.archaeologyonline.org/Documents/TheOrkneyHood.pdf

Tuesday, May 22, 2018

Warp-weighted loom weights: Their Story and Use


I wrote a research paper on warp-weighted loom weights for entry in the 2018 A&S Pentathlon competition at the Festival of the Passing of the Ice Dragon in the Barony of the Rhydderich Hael, A.S. 52.

Loom weights are the unmistakable evidence for the historic use of warp-weighted looms and their ample archaeological evidence gave the loom its name. This paper gives a brief discussion of the history of loom weights and the wide range of materials, shapes and weights that were found in archaeological excavations. I discuss the many aspects that affect the amount of tension that is needed or desired by each individual weaver and the way the organization of the loom weights affect the weaving.

The full manuscript can be downloaded from:
https://www.academia.edu/36693514/Warp-weighted_loom_weights_Their_Story_and_Use

Monday, November 27, 2017

Weaving linen fabric to create a tunic based on the 11th century Viborg Shirt

The first full weaving project on my warp-weighted loom is finished: a Viking age apron dress for my wife. I figured that the second project should be something that I can wear myself. The apron dress was woven with wool, so I decided to give linen a try to advance my weaving skill on the warp-weighed loom in a different direction. A further practical reason for linen is my intolerance to wearing wool garments. With our Viking personas in mind, I researched the literature for archeological evidence of a male Viking tunic. The most striking extant piece that closely represents our personas’ time frame and location is an 11th century linen tunic found near the town of Viborg in the center of Jutland, Denmark. So I decided to start weaving linen fabric for a reproduction of this piece.


Historic background

Weaving wool or linen for clothing on a warp-weighted loom has a very long history. The first comprehensive study of this type of loom from archeological evidence and literature available to her at that time was given by Marta Hoffmann in 1964. Since then many other researchers have contributed to a further understanding in the use, history, products, and living history of this ancient loom. I particularly like a recent publication by Hildur Hákonardóttir, Elizabeth Johnston and Marta Kløve Juuhl that tells the story of three women who through six years of work and research contributed an extensive first hand knowledge of weaving on a warp-weighted loom. It also serves well as a reference to research that has been published since Marta Hoffmann’s book.

Most of our hands-on knowledge of Viking age fabrics and garments derives from textile fragments found in graves. There are very few well preserved remains of tunics from the Viking age. The two most extraordinary exceptions are of a whole tunic found at the edge of the recently retreated Landbreen glacier in Oppland County, Norway and the greater part of tunic found near the town of Viborg in the center of Jutland in Denmark. The first one was found in 2011 by archaeologists from Oppland’s Glacier Archaeology Rescue Program. They discovered a crumbled-up piece of textile approximately 0.58 by 0.29m in size in a pit at the upper edge of the ice patch exposed by the thawing of the glacier (Figure 1).

Figure 1: The Lendbreen tunic in situ.

Closer examination revealed a whole tunic made from wool and woven in diamond twill. The fabric is partly bleached where exposed to the sun and wind (Figure 2). Radiocarbon dating shows that the tunic was made between AD 230 and 390. The tunic is relatively short and constructed from a simple cut. The chest girth measures approximately 1.08m. By modern size standards, the tunic would thus fit a slender man, 1.7–1.76m in height.

Figure 2: The front of the Lendbreen tunic. Museum of Cultural History, University of Oslo.

The second one was found during the Viborg stiftsmuseum’s excavation near the town of Viborg in the center of Jutland in Denmark in 1984/85. The excavation site was located on the shore of Søndersø, which was inhabited from about 1000 until about 1300 AD. The fabric fragments (Figure 3) were found in a pit that most likely was a post hole. They were dated to the 11th century by stratigraphical analysis of the pit. The damp conditions at the Søndersø site favored preservation of organic materials and although the linen shirt is not preserved in one piece, it was still an extraordinary find.

Figure 3: The preserved parts of the front (left) and the back (right) of the shirt.

Fiber and weaving analysis shows that the Viborg shirt was made of single ply Z/Z-spun natural linen thread, woven in tabby weave with a density of about 20/12 per cm. The warp thread is a little thicker and somewhat more tightly spun than the weft thread . Analyses of the fabric fragments and the seams lead to the following reconstruction (Figure 4): A rather slim-fit poncho without seams on top of the shoulders, a skirt that is open on both sides and a neck lining that is continued into two ribbons for tying. The upper part of the shirt has a band, which is radially stitched to the outer garment. It is presumed that the shirt had long sleeves.

Figure 4: Reconstruction of the Viborg shirt.

Recreating the Viborg shirt

The fact that the Viborg shirt was woven from linen fabric and dated more closely to my persona’s time frame tipped the balance in favor of recreating this shirt rather than the Lendbreen tunic. I started setting up my warp-weighted loom to weave fabric enough for a shirt that will fit me based on the pattern reconstruction as presented by Mytte Fentz (Figure 5). Given my chest size of 23 inch and the maximum weaving width of my loom of about 3 feet, I decided to warp the loom for a width of the widest piece of the pattern. Allowing for seams, shrinkage after washing and possible narrowing of the warp during weaving, I created a warp with a width of 28 inch. I then compensated for the need of the remaining pieces by creating a longer warp.

I bought unbleached natural single ply z-spun linen thread in two thicknesses, 12/1 for the warp and a slightly thinner 20/1 for the weft. A small sample test weave resulted in a warp count of 17 threads per cm and a weft count of 8 threads per cm, reasonably close to the 20/12 per cm in the extant piece.

Figure 5: The reconstructed pattern for the Viborg shirt.

Warping the Warp Weighted Loom

I created a tablet woven starter band on ten tablets. The warp of the starter band was the same 12/1 linen thread as used for the warp of the fabric. At each turn of the tablets, I passed a loop of the 12/1 linen thread through the shed. The weft of the started band becomes the warp for the loom. One advantage of having two threads in each shed in the starting border is a closer warp. Another is that the ball of yarn that forms the weft of the starting border does not have to pass through the shed. Instead a loop is pulled from the cone of yarn and passed through the shed and around a series of pegs, while the cone itself remains where it is. Each loop is wound around pegs to a length equal to the desired length of fabric plus a margin for the loom waste and shrinkage after washing. I turned the cards in sets of 25 picks. After each set, I cut the loops of the threads at the last peg and split them in two bundles. I made sure to wind the threads around the last peg in the same direction for each pick. So after cutting the loops, the two bundles split naturally into the two parts that form the natural shed of the warp.

Warping setup (left) and half completed starter band (right).

Next, I transferred and secured the finished starting border to the cloth beam. First, I tied the band firmly in place by threading a 12/1 linen cord through the selvage side of the band and the holes in the cloth beam. Next, I tied additional loops at a closer spacing to prevent sagging of the header band due to the fairly high tension in the warp threads once the weights were attached.

The starter band secured to the cloth beam.

After transferring the warp to the loom I knitted the heddles for tabby weave. You can tie each heddle individually, but it is more convenient to knit continuous heddles. I placed a helper rod behind the warp to ensure equal length heddles and knitted the heddles by looping around each thread of the back warp around the heddle rod and the helper rod, making sure to pass each end of the loop between the same two threads of the front warp.

Knitting the heddles.

Finally, I attached the loom weights to the warp and created the spacing cords. The loom weights were made from unfired clay. They are about 320 gram each with minimal weight variation. I started out with 25 warp threads tied to each loom weight, but found the tension in the warp threads to be a bit low for a good shed. So I reduced the number to 20 threads per loom weight. Since the total warp length is significantly longer than the height of the loom, the surplus warp was braided. To make tying and untying to feed more warp after weaving a bit more efficient, the braids are not knotted directly to the loom weights directly, but instead each one is secured by a loop, which is in turn attached to the loom weight. After the weights were tied to the bundles, the warp was split into the natural shed. I tied a crochet chain across the back threads and after that a similar one across the front threads. This so-called spacing cord helps to distribute the individual warp threads evenly over the full width of the weave. Each time the cloth is rolled onto the cloth beam, the spacing cord will slide down along the warp threads to just below the shed rod.

Attaching the weights.

Knitting the crochet spacing cord.

Weaving

With the loom warped it was time to start weaving. The tricky part is figuring out how much weft to give in each pick to prevent the weave getting narrower and narrower as you go along. I loosely looped the weft at each pick instead of pulling it tight. Too loose and you get loops in the weave, too tight and the fabric narrows. Right now the selvages are straight and the width is constant, but I have not woven enough to see if tightening becomes an issue. The selvages are straight so far. The other tricky part is how hard to beat the weft after each pick. Right now I beat it as tight as I feel comfortable doing resulting in a weft thread count that is just slightly lower than that in the extent piece.

The natural shed (left) and the counter shed (right).

The first two inches of fabric.

To be continued after weaving is complete 😀

Bibliography

Ejstrud, Bo (Editor) (2011) “From Flax to Linen - Experiments with flax at Ribe Viking Centre” Maritime Archaeology Programme, University of Southern Denmark.

Fentz, Mytte (1993) “Vikingeskjorten fra Viborg”, Viborg Stiftsmuseum
https://vk.com/doc-32206289_294592421?dl=971c82b3a61faf9e5f

Fentz, Mytte (1987) “An 11th century linen shirt from Viborg”, translated by Maggie Mulvaney. This article appeared as "En hørskjorte fra 1000-årenes Viborg" in KUML 1987; Årbog for Jysk Arkælogisk Selskab.
http://www.forest.gen.nz/Medieval/articles/Viborg/VIBORG.HTM

Hoffman, Marta (1974) “The Warp-Weighted Loom: Studies in History and Technology of an Ancient Implement”, Robin and Russ Handweavers.

Hákonardóttir, Hildur, Johnston, Elizabeth, and Kløve Juuhl, Marta (2016) “The Warp-Weighted Loom”, Randi Andersen and Atle Ove Martinussen (Editors).

Petty, Christina (2014) “Warp Weighted Looms: Then and Now Anglo-Saxon and Viking Archaeological Evidence and Modern Practitioners”, Ph.D. thesis, University of Manchester, Manchester, UK

Plunkett, Steven J. (1999) “The Anglo-Saxon Loom from Pakenham, Suffolk” Proceedings of the Suffolk Institute of Archaeology and History, Volume XXXIX Part 3.

Priest-Dorman, Carolyn (1997) “Viking Tunic Construction”
http://www.cs.vassar.edu/~capriest/viktunic.html (last updated 04/17/97).

Priest-Dorman, Carolyn (2001) “Weaving on the Warp-Weighted Loom: Some Source Materials” http://www.cs.vassar.edu/~capriest/wwloom.html (last updated 06/17/02).

Uusitalo, Ulla-Mari (last accessed at 10/25/17) “Male linen shirt of 11th century, from Viborg, Denmark”
http://utankamari.net/wp-content/uploads/2011/06/viborgshirt.pdf

Vedeler, Marianne and Bender Jørgensen, Lise (2013) “Out of the Norwegian Glaciers: Lendbreen – a tunic from the early first millennium AD”, Antiquity, Vol. 87 No. 337 pp. 788–801.

Verberg, Susan (2016) “A fencing tunic based on the 11th century Viborg Shirt”
https://www.academia.edu/27845542/An_SCA_approved_fencing_tunic_based_on_the_11th_century_Viborg_Shirt

Saturday, September 9, 2017

Weaving broken diamond twill fabric to create a Viking age apron dress

During the Viking age fabric for clothing was woven on a warp-weighted loom and since I have always been interested in wood working, I decided to build one myself. After finishing the loom, I wove a small plain test weave to see if the loom worked and if weaving on one suited me. It did and since my wife has so far made all our garb, I decided it was time to return the favor. With our Viking personas in mind, I decided to setup the loom and weave enough fabric to make her an apron dress.

The finished apron dress.

Historic background

Weaving wool or linen for clothing on a warp-weighted loom has a very long history. The first comprehensive study of this type of loom from archeological evidence and literature available to her at that time was given by Marta Hoffmann in 1964. Since then many other researchers have contributed to a further understanding in the use, history, products, and living history of this ancient loom. I particularly like a recent publication by Hildur Hákonardóttir, Elizabeth Johnston and Marta Kløve Juuhl that tells the story of three women who through six years of work and research contributed an extensive first hand knowledge of weaving on a warp-weighted loom. It also serves well as a reference to research that has been published since Marta Hoffmann’s book.

Unfortunately, as of yet, no remains are found of an actual complete warp-weighted loom from prehistoric times. All looms currently on display in museums are made at a much later date, mostly in the late 18th and 19th century. There is however ample pictorial evidence of its existence in historic times. Furthermore, there is indirect evidence from archeological finds of loom weights and from the existence of woven borders on many textile fragments of a type that is characteristic for fabric that is woven on a warp-weighted loom.

The burial finds from over 1100 graves alone in Birka, the commercial center of Sweden in the Viking age, account for thousands of samples of textile fragments. They include examples of plain or tabby weave, plain 2/2 twill and of several more complicated types of twill. Examples relevant to this documentation are of a specific type of twill, typically called lozenge of (broken) diamond twill (Figure 1). Agnes Geijer was the first to point out that all lozenge and chevron twills from prehistoric times are broken and asymmetrical and linked this observation to the specific way of warping and weaving on a warp-weighted loom. It is for this characteristic link between a type of weave and weaving on a warp-weighted loom that I chose to weave broken diamond twill for this project.

Figure 1: Examples of textile fragments of herringbone twill (top right) and broken diamond twill (top left and bottom) from the graves of Birka.

Warping the loom

I warped my loom for broken diamond twill using a diagram by Martha Hoffmann based on an extend piece from an excavation in Kaupang from the 9th century A.D. (Figure 2).


Figure 2: Textile fragment of broken diamond twill from Kaupang, Vestfold (top) and its diagram (in reverse, bottom).

Creating the header band

The first step was creating the header band, which formed the starting edge of the warp, the side that was secured to the cloth beam. There is historical evidence for two types of starting edges associated with the warp-weighted loom: a woven border and corded edge. It is the first type that is so characteristic for the warp-weighted loom. It is the oldest type of starting edge dating back to prehistoric times and still in use by Sami weavers.

Because of the unique relation between woven starting borders and weaving on a warp-weighted loom, I decided to warp my loom with one as well. I created a tablet woven starter band on ten tablets with two different warp colors (the same wool as for the loom warp), setup and turned to create a diamond pattern with the same period as the pattern in the fabric. At each turn of the tablets, I passed two threads through the shed that became the warp threads for the loom. One advantage of having two threads in each shed in the starting border is a closer warp. Another is that the ball of yarn that forms the weft of the starting border (and later the warp of the fabric) does not have to pass through the shed. Instead a loop is pulled from the ball of yarn and passed through the shed and around a peg, while the ball itself remains where it is. Each loop is wound around pegs to a length equal to the desired length of fabric plus a margin for the loom waste and shrinkage after washing.

I turned the cards in sets of twenty picks. After each set, I cut the loops of the threads at the last peg and split them in two bundles. I made sure to wind the threads around the last peg in such a direction that I ended up with alternating threads in each bundle. So after cutting the loops, the two bundles split naturally into the two parts that form the natural shed of the warp.

Securing the header band to the cloth beam

The next step was transferring and securing the finished starting border to the cloth beam. First, I tied the band firmly in place by threading a strong cord through the selvage side of the band and the holes in the cloth beam. Next, I tied additional loops at a closer spacing to prevent sagging of the header band due to the fairly high tension in the warp threads once the weights were attached.

Attaching the weights

The next step was attaching the loom weights to the warp. I made my loom weights from unfired clay. They are about 400 gram each with minimal weight variation. I started out with twenty warp threads tied to each loom weight, but found the tension in the warp threads to be too low for a good shed. So after weaving about two feet of fabric, I reduced the number to ten threads per loom weight. Since the total warp length was significantly longer than the height of the loom, the surplus warp was braided. Each time after weaving about two feet, the finished fabric was rolled onto the cloth beam, the loom weights were untied, the braids were adjusted to the correct length and the loom weights were retied. To make this process more efficient, the braids were not knotted directly to the loom weights, but instead each one was secured by a loop, which was in turn attached to the loom weight.

Creating the spacing cords

After the weights were tied to the bundles, the warp was split into the natural shed. I tied a crochet chain across the back threads and after that a similar one across the front threads. This so-called spacing cord helps to distribute the individual warp threads evenly over the full width of the weave. It also greatly helps during the knitting of the heddles by keeping the order of the threads in the warp near the heddle rods the same as in the header band. Each time the cloth was rolled onto the cloth beam, the spacing cord was slid down along the warp threads to just below the shed rod.

Knitting the heddles

The last phase in warping the loom was the knitting of the heddles. You can tie each heddle individually, but it is more convenient to knit continuous heddles. I placed a helper rod behind the warp to ensure equal length heddles (the heddles are knitted by looping around the heddle rod and the helper rod). I started with the second/middle heddle rod, followed by the first/top one and at last the third/bottom one. Figure 3 shows the diagram that I used to knit the heddles, derived from the extent textile fragment and its diagram in Figure 2.

Figure 3: Diagram for knitting the heddles for broken diamond twill.

Knitting the heddles is tricky work as the order of the threads must be the same as in the header band. I enlisted the help of my wife to stand on the back of the loom and hand me each successive thread, while I paid attention to the order of the heddles in the diagrams. To aid the knitting of the heddles, I drew simplified diagrams for the heddles for each heddle rod (see Figures 4 to 6 below).

Figure 4: Heddles diagram for the upper or “1” rod.

Figure 5: Heddles diagram for the middle or “2” rod (the opposite of the natural shed).

Figure 6: Heddles diagram for the lower or “3” rod.

Look for movies of each step in the warping process elsewhere on this blog.

Weaving the fabric

With the knitting of the heddles completed I could start the actual process of weaving of the fabric. I started with all the heddle bars resting against the uprights. This creates an open space between the two parts that make up the warp (between the front and the back threads, separated by the shed rod). This open space is typically called the natural shed. Next I passed the weft through the open shed. Instead of pulling the weft threat tight, I formed a triangle and loosely looped the weft thread to give the thread room to wrap around the warp threads. If you do not give some extra room, the weave will gradually narrow once you start weaving. The extra room (the size of the triangle) required to keep a uniform width depends on the width itself, the tension on the warp threads and thickness of the warp and weft threads and has to be known by experience or found experimentally.

Figure 7: The four sheds required to weave twill: “N” (top left), “1” (top right), “2” (bottom left) and “3” (bottom right).

After starting with the natural shed, I pulled the bottom or “3” rod forward to rest against the ends of its heddle rod holders, leaving the other two heddle rods resting against the uprights, thus creating a new shed. I inserted the beater to beat the warp upward after which I passed the weft in the opposite direction for the next pick. After that I continued with either the natural shed or one of three sheds formed by pulling any single heddle bars forward to rest against the ends of its respective heddle rod holders, followed by beating and passing the weft for the next pick.

To reproduce the broken diamond twill pattern of the extent fabric fragment in Figure 2, the order of the heddle rods is a sequence of ten sheds: N-3-2-N-1-2-3-N-2-1, where “N” designates the natural shed and “1”, “2” and “3” the shed created by pulling forward the respective top, middle or bottom heddle rod (see Figure 7 above).

Look for a movie of the weaving of broken diamond twill on a warp-weighted loom elsewhere on this blog.

Creating the apron dress

The apron dress is a tube like dress worn by Viking women together with the characteristic brooches. This was my first full size weaving project, so I decided to keep the fabric width as narrow as I could, minimizing the length of the header band, the number of heddles and the total combined weight of the loom weights. With this in mind, I used a six piece pattern cut from four equal sized rectangles from a single long piece of fabric (Figure 8). Two pieces form the front (including the start of the fabric with the header band intact) and the back of the dress. The remaining two pieces are cut in two wedges each to form the sides of the apron dress (two wedges together on each side). This pattern is very economic, wasting nothing of the fabric with the exception of the loom waste (and with the smaller width, the latter is also minimal).

Figure 8: The four piece pattern used to make the apron dress.

The size of the fabric was dictated by the required chest size (E) of 38 inch, height (D) of 40 inches and bottom hem size (F) of around 60 inches. With half inch wide seam allowances (S) and a width (W) of 14 inch, this translates into A=13 inch, B=3 inch and C=9 inch. Allowing for shrinkage and loom waste, I decided to setup the weave for a width of 15 inch and a length of 20 feet. It turned out to be quite difficult to keep a constant fabric width at the start of weaving, but after the first feet or so, I was able to maintain an almost constant width of about 14 inch.

I took the fabric off the loom after completing about 17 feet of fabric. I then washed the fabric gently in lukewarm water to set the weave. After washing, the width of the weave was about 14 inch at the top and about 13 inch wide along the remaining length, so I could use dimensions close to those listed above. I cut the fabric into four panels, the first (front) panel with the header band attached to a length of 42 inch, the remaining three to a length of 44 inch each. I then cut the four wedges that form the sides of the dress from two of the panels.

After cutting the fabric into the six panels, I turned the long edges of each panel once (both the selvage sides and the raw edges of the wedges along the bias) and secured them with whip stitch. I then joined each seam with whip stitch (Figure 9).

Figure 9: Seam with the edges folded once and secured with whip stitch, then joined together with whip stitch.

The bottom and the top hem, with the exception of the front panel with the attached tablet woven starter border, were folded once and secured with herringbone stitch (Figure 10) to allow for extra stretch while dressing. The hems were folded to get a total dress length (D) of 40 inch.

Figure 10: Hem with the edge folded once and secured with herringbone stitch.

The last part was weaving the shoulder straps. I wove a one inch by eight feet plain tabby band from the same wool as the dress itself. After weaving was completed, the band was folded twice and whip stitched into a tubular band. The band was cut into three pieces and sewn to the dress. Two short pieces on the front and one long one to form both shoulder bands.

Find a downloadable and extended version of this post with its companion photo journal at:
https://www.academia.edu/34218973/Weaving_broken_diamond_twill_fabric_to_create_a_Viking_age_apron_dress

Bibliography

Ejstrud, Bo (Editor) (2011) “From Flax to Linen - Experiments with flax at Ribe Viking Centre” Maritime Archaeology Programme, University of Southern Denmark.

Geijer, Agnes (1938) “Birka III: Die Textilfunde aus then Gräbern”, Kungl. Vitterhets Historie och Antikvitets Akademien (Uppsala).

Geijer, Agnes (1983) “The Textile Finds from Birka”, Cloth and Clothing in Medieval Europe: Essays in Memory of Professor E.M. Carus-Wilson, ed. N.B. Harte and K.G. Ponting, Studies in Textile History 2, London: Heinemann Educational Books, pp. 80-99.

Hägg, Inga (1984) “Die Textilfunde aus dem Hafen von Haithabu”, Beright 20, Berichte über die Ausgrabungen in Haithabu, Karl Wachholtz Verlag, Neumuster.

Johnson, Jennifer (2015) “Viking Stitchery”, SCA class handout by Hefðharkona Reyni-Hrefna.

Hoffman, Marta (1974) “The Warp-Weighted Loom: Studies in History and Technology of an Ancient Implement”, Robin and Russ Handweavers.

Hákonardóttir, Hildur, Johnston, Elizabeth, and Kløve Juuhl, Marta (2016) “The Warp-Weighted Loom”, Randi Andersen and Atle Ove Martinussen (Editors).

Petty, Christina (2014) “Warp Weighted Looms: Then and Now Anglo-Saxon and Viking Archaeological Evidence and Modern Practitioners”, Ph.D. thesis, University of Manchester, Manchester, UK

Plunkett, Steven J. (1999) “The Anglo-Saxon Loom from Pakenham, Suffolk” Proceedings of the Suffolk Institute of Archaeology and History, Volume XXXIX Part 3.

Priest-Dorman, Carolyn (2001) “Weaving on the Warp-Weighted Loom: Some Source Materials” http://www.cs.vassar.edu/~capriest/wwloom.html (last accessed 09/08/17).

Verberg, Susan (2016) “Women’s set of Viking winter clothes based on 10th century Haithabu garment finds”

A reconstruction of the Hammerum Girl's dress (English) https://vimeo.com/146693682 (last accessed 09/08/17).
Wednesday, July 5, 2017

Movies on some aspects of weaving on a Warp-Weighted Loom

I made some movies for a class on the WWL. How to tablet weave the starter band, how to knit continuous heddles, how to crochet the spacing cord, and how to tie/retie the weights after rolling up the cloth on the cloth beam. I was setting up for tabby, but the essentials also hold for twill.

Warping the loom:


Knitting the crochet spacing cord:


Knitting the heddles:

Redoing the weights:

Find a handout that accompanies these movies at:
https://www.academia.edu/33710255/You_too_can_warp_and_weave_on_a_Warp-Weighted_Loom

Weaving twill on a Warp-Weighted Loom

Here is a movie of weaving broken diamond twill on my warp-weighted loom:


I warped the loom using a diagram by Martha Hoffmann based on an extend piece from an excavation in Kaupang from the 9th century A.D.:


Martha Hoffmann also provides a diagram for knitting the heddles based on this piece:


To aid the knitting of the heddles, I drew simplified diagrams for the heddles for each heddle rod:

Figure 1: Heddles diagram for the upper or “1” rod.

Figure 2: Heddles diagram for the middle or “2” rod (the opposite of the natural shed).

Figure 3: Heddles diagram for the lower or “3” rod.

To reproduce the broken diamond twill pattern of the extent fabric fragment above, the order of the heddle rods is a sequence of ten sheds: N-3-2-N-1-2-3-N-2-1, where “N” designates the natural shed and “1”, “2” and “3” the shed created by pulling forward the respective top, middle or bottom heddle rod.

Figure 4: Close-up of a piece of the woven fabric.

Bibliography

Hoffman, Marta (1974) “The Warp-Weighted Loom: Studies in History and Technology of an Ancient Implement”, Robin and Russ Handweavers.

Thursday, June 29, 2017

Viking hand bag based on the Haithabu / Hedeby find.

I had started the first test weave on my warp-weighted loom and was looking for an application. The original plan was to make a Viking hood, but for various reasons the weave ended up being too narrow to be practical. I already had a so-called Haithabu bag made for me by a family member and realized that this test weave was the perfect size for one made by myself. I have always loved woodworking and the wooden handles that define this type of bag made it the perfect combination for an interesting A&S project.

 
Historical background

The name of the bag is derived from Haithabu (German) or Hedeby (English) after the location of an archaeological excavation in present-day Germany. The excavation yielded a number of narrow carved wooden pieces, rounded and with holes on both ends and a set of narrow elongated slots along the straight length (Figure 1). Some of the pieces had textile remnants through the slots, although nothing survived to the present day. The current interpretation is that they are bag handles after comparison with an earlier Sami find (Figure 2). They have a surprisingly simple but effective design; the wooden handles hold and maintain the shape of the bag and a single shoulder cord through the holes allows you to carry it, while keeping the bag closed at the same time.

Figure 1: Photograph of the wooden bag handles on display in the Haithabu Museum (http://europa.org.au/index.php/articles/21-bags).

Figure 2: Photograph of a Sami leather bag with antler handles .

A total of fourteen pieces where found at the Haithabu excavation site. Five are made from ash, five others from maple and the remaining four are not specified. They have rounded ends with holes drilled through for the carrying cord. The bottom edges are mostly straight, the top edges are wavy or with notches. Elongated slots along the bottom serve to attach the bag. Dimensions vary from 181 to 496 mm in length (Figure 3), a thickness of 7 to 13 mm, and 29-52 mm wide in the center part. The semicircular ends have diameters ranging from 31 to 61 mm, and have a 7 to 10 mm diameter (drilled) hole in the center. Two of the pieces were identical (HbH.119.001-002), i.e. a pair, and it is therefore assumed that the others should all have been part of pairs.

Figure 3: Four of the wooden pieces, ranging in length from 181 to 496 mm: HbH.119.003, HbH.119.012, HbH.119.013, and HbH.119.014 (top to bottom).

Creating the bag handles

I decided to create an accurate reproduction of the HbH.199.003 wooden handles. This choice was partially a matter of taste, but mostly a matter of size. The original size of this handle is 181 mm, which is almost a perfect match to the width of the fabric that I planned to use for the bag. I started by copying and scanning the top handle in Figure 3. The design was then enlarged and printed to get a length of 205 mm, slightly larger than the original, but a better match with the fabric. From the ratio of the length and thickness in Figure 3, I computed a corresponding thickness of about 9 mm. Since the original piece was damaged along the top, curved arches were added in a way that looks consistent with and in good proportion to the curved end pieces and the overall design.

Florian Westphal does not list the wood type for this particular handle, so I decided to use ash given that five of the fourteen handles were made from ash and the fact that a suitable ash log was available to me (a leftover piece of the ash logs that I harvested for another project). The log was split along the centerline with an ax into five boards. The center board was discarded in favor of the two boards on either side. This ensures that the wood grain is predominantly parallel with the face of the handle, avoiding potentially weak spots at the slot locations. The two boards were then shaped to the correct thickness and to a slightly larger outer dimension using an ax, a draw blade and a coarse rasp and finished with a file to a smooth outer surface.

The outline of the handle and the locations of the holes for the shoulder strap and the other five holes were traced onto each board using the real size printed design. The holes were cut out using a drill and chisels and finished with several files. When everything else was completely finished, the outline was cut out with a saw. The final handles were finished with linseed oil to help preserve and protect the wood.

The tools required to make the handle (axe, hammer, several chisels and files, rasp, draw blade, saw, and spoon drills) were quite common in Viking Age Haithabu. Examples of all these tools were found in the Mästermyr chest, a Viking Age tool chest from Gotland. Functionally identical modern versions of these hand tools were used to create the handles with the exception of the spoon drills and the saw. I have not yet laid my hands on spoon drills, so a modern drill was used instead. Due to an elbow injury, use of a handsaw was not an option, so a band saw was used to cut the outline of the handles.

Figure 4: Reconstruction of the HbH.119.003 handle.

Weaving the fabric for the bag

There is no actual archaeological evidence for the bags that went with the Haithabu handles, but we can make an educated guess as to the shape, size and material. The width is dictated by the length of the handles, while pictorial evidence of period shoulder bags suggests an almost square form. The Sami bag in Figure 2 was made from leather, but textile evidence with some of the Haithabu handles at the time of excavation makes it plausible that fabric was used as well. I settled on the latter, since my motivation for this project stemmed from the desire to make something nice and useful with my first piece of hand woven cloth.

The cloth for the bag was woven on a reproduction Viking Age warp-weighted loom. A tablet woven band was used as the starting band for the warp. The same (store bought) wool was used for the warp and the weft. The loom was setup for plain tabby weave with a warp count of about 6/cm, and a weft count about 4/cm. A single piece, the full width of the woven fabric, was used for the front, the bottom and the back of the bag. Two additional pieces, half the width of woven fabric were used for each side, they are added to allow the bag to open wide enough for practical use. Selvage on both sides was obtained by weaving both sides at the same time after splitting the warp in two equal sections (Figure 5).

Figure 5: The finished fabric before cutting it in three pieces.

Assembling the bag

The three pieces of fabric for the bag were hand sewn together. Running stitch was used to join each seam; both edges were then folded down and secured with a whip stitch. The top of the bag was hemmed by folding the edges back once and whip stitch along the raw edge. A linen liner was added to protect the wool fabric and make the inside of the bag stronger for practical use. The liner was assembled in a similar fashion with the exemption of the reversed seams and hems. The outer wool fabric and the liner were joined with a running stitch along the hems.

After the bag was completed, the wooden handles were attached with a thick yarn stitched through the hems and looped through the elongated slots. Finally, a shoulder band was braided from three strings of leather and tied to the bag handles through the holes in each of the round ends.

Learning points

Handles:
Using period hand tools for wood working is fun and surprisingly efficient. I hope to get spoon drills in the near future, so that I can experiment with those as well.

Weaving:
While weaving the header band, I passed only a single weft tread for each turn of the cards (this becomes the warp on the loom), resulting in a fairly open warp, making it hard to maintain a constant width during the weaving. In a current weaving project, I passed two weft threads for each quarter turn of the cards, reducing this issue significantly. To prevent “sagging” of the warp, it must be tied to the cloth beam at more positions.

Shoulder strap:
The braided leather band is a bit to thick and stiff for easy opening and closing of the bag. I plan to either weave or braid a cloth shoulder band to replace the current leather strap.

Find a downloadable version of this post with its companion photo journal at:
https://www.academia.edu/33710073/Viking_hand_bag_based_on_the_Haithabu_find

Bibliography

Arwidsson, Greta and Berg, Gosta (1999), “The Mästermyr Find: A Viking Age Tool Chest from Gotland”, Larson Publishing Company (Lompoc, CA)

Johnson, Jennifer (2015) “Viking Stitchery”, SCA class handout by Hefðharkona Reyni-Hrefna.

Schietzel, Kurt (2014) “Spurensuche Haithabu: Archäologische Spurensuche in der frühmittelalterlichen Ansiedlung Haithabu. Dokumentation und Chronik 1963-2013”,
Wachholtz Verlag, Murmann Publishers (Neumünster/Hamburg).

Westphal, Florian (2006) “Die Holzfunde von Haithabu”, Wachholtz Verlag (Neumünster).

Plain weave fabric for a Hedeby wood handled bag

A photo Journal of weaving fabric for a Viking hand bag on a warp weighted loom. Below is the finished bag after attaching the handles and adding the leather braided shoulder strap.


Creating the fabric for the bag start with tablet weaving the starter band. The weft of the band becomes the warp for the loom. By looping the thread around the last peg, and bundling the threads on either side before cutting in the middle, the warp splits naturally into the front and back warp.

The tablet woven starter band.

Attaching the header band to the cloth beam.

Knitting the heddles.

Weaving in progress. The loose loops in the weft before changing the shed and beating the weft are required to maintain an even weave of constant width.

Getting somewhere...

Et voilà: my very first weave from a warp-weighted loom. The top part becomes the front, bottom back of the bag. The two narrow parts at the bottom become the sides.

The assembled bag. A linen liner (store bought) was added to protect the wool fabric during use and to strengthen the bag.

Gold brocaded headband inspired by a find from the Shestovica cemetery; Second half 10th century AD, Chernigov, Ukraine

I was looking for a project to try something new with tablet weaving: brocading with metallic thread. A headband as part of the Wardrobe Pro...