Tuesday, November 13, 2018

Gold brocaded headband inspired by a find from the Shestovica cemetery; Second half 10th century AD, Chernigov, Ukraine

I was looking for a project to try something new with tablet weaving: brocading with metallic thread. A headband as part of the Wardrobe Project for Her Majesty, Queen Siobhán inghean uí Liatháin, was the perfect excuse.

Historical background

This project is inspired by a second half 10th century grave find from the Shestovica cemetery in Chernigov, Ukraine (Figure 1). The find and several others in a new series of graves that were exposed during excavations of sites for new building developments are discussed by Kirill Mikhailov, who had permission from the excavators to study the grave objects. The extant piece that was my inspiration was a narrow band, one of several garment fragments from the Viking age Shestovica cemetery, excavated in 2005 under direction of V. P. Kovalenko. The band is c. 10 mm wide, tablet woven of silk and silver thread consisting of drawn silver wire. Its position in the grave relative to the male burial and the other textile fragments suggests that it formed the edging of a wool mantle. Kirill Mikhailov discusses its similarity with gold and silver brocaded bands found in a large number of burials from the Viking age trading center Birka in current day Sweden (discussed extensively by Agnes Geijer).

Figure 1: Tablet-woven band from the grave chamber, Shestovica cemetery, Chernigov, Ukraine (Photo K. Mikhailov).

Technique, material and design

The band that inspired this project is a tablet woven silk band with a silver brocaded pattern. Its materials and technique are very similar to those of many Birka bands. They consist of: (a) the basic ground weft that binds the warp threads together, hidden by them in the usual way, and (b) a second, brocading weft of double drawn silver wire, creating the actual pattern or design. The brocading weft consists of a pattern of floats and hidden sections by passing the weft underneath one or more warp threads of one or more cards. I chose to use gold thread instead of silver, which better suited the purpose of the project. The use of gold thread in brocaded bands, although much more rare than silver thread, is supported by contemporary Viking age grave finds.

The pattern was obtained from a blog post on "Aislings Welt". The author of the blog obtained the pattern by examining the photograph of the band and weaving several attempts until it visually matched the extant piece. The pattern was woven on 19 cards with four threads per card. The warp was store bought 60/2 silk, the ground weft was store bought silk sowing thread and the brocading weft was store bought gold thread (#7 metallic gold around a silk core). This resulted in a width of about 12 mm, close to that of the extant piece. The warp tension was approximately 7 g/thread, resulting in a pattern where the diagonal lines were at close to 45 degree angles with respect to the centerline of the band, consistent with the extant piece. The final woven length of band was c. 22 inch.

The extant piece clearly shows the use of a double brocading weft. Looking more closely at the bottom right edge in Figure 1, you can see that the brocading wefts are woven together as a pair and extend to the edge of the selvage. While this may be fine for trim on a mantle, I did not like the idea of the occasionally somewhat sharp kinks due to loops at the edges of the band for a headband that is worn either directly on the forehead or over a thin veil. Hence, I chose not to extend the brocade all the way to the edge of the band. I also chose to weave each of the brocading wefts form alternate sides, one going from left to right, the other from right to left in each pick. This gives more even selvages and greatly helps to keep both brocading wefts flat and parallel in each pick.

According to Nancy Spies  the most common turn type of the brocading wefts between each pick is to dive to the back of the band between one or more of the outer cords and back to the front of the band on the return pick between the same cords (as shown in the left panel of Figure 2). It is common with this turn type to find that the metallic brocading weft, over time, cut the ground weft, which explains why many early bands are missing their edges. I also found that this turn type tends to pull the very thin ground weft through the band, leading to sloppy selvages. To solve this, I chose to turn the brocading weft around the second-last cord on each side as illustrated in Figure 3 for the left selvage. The treatment at the right selvage is simply the mirrored version of the left one. This turn type is a slight variation of the turn type shown in the right panel of Figure 2.

Figure 2: Two turn types of the brocading weft between successive picks as discussed by Nancy Spies.

Figure 3: Schematic of the turn type of the brocading weft between successive picks at the left selvage as used for the current project.

Weaving the band

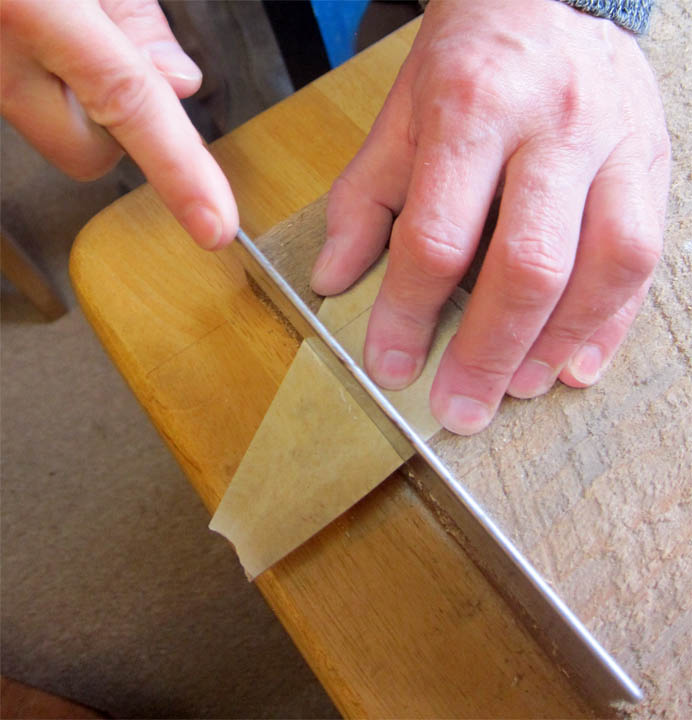
The band was woven on a warp weighted tablet weaving loom that I designed and build for earlier projects. The loom is designed to use on the top of a table, with the warp ends weighted down and dropping freely over the fixed rod at the end of the loom. The other end of the warp is attached to a ratcheted rod, which stores the finished band. The initial warp length was about 36 inch, enough to create the required length of band plus room to compensate for the take-up during weaving and to experiment a bit or create a sample piece for later reference.

The warp was created one card at the time, threading back and forth twice per card. The cards were warped alternating S and Z (to eliminate fouling of the warp threads during turns). The brocading wefts passed under two of the four threads of the cord creating a smooth and uniform underside. There is no evidence in the extant piece that the twist direction was changed along the band (although the piece is too short to be conclusive on this issue). I choose therefore to rotate all cards collectively forward one quarter turn for each successive passage of the ground and brocading wefts. As discussed above, the two brocading wefts were passed from alternate sides as can be seen in Figures 4 and 5. The unfinished warp ends were periodically untwisted to eliminate the build-up twist.

Weaving the band.

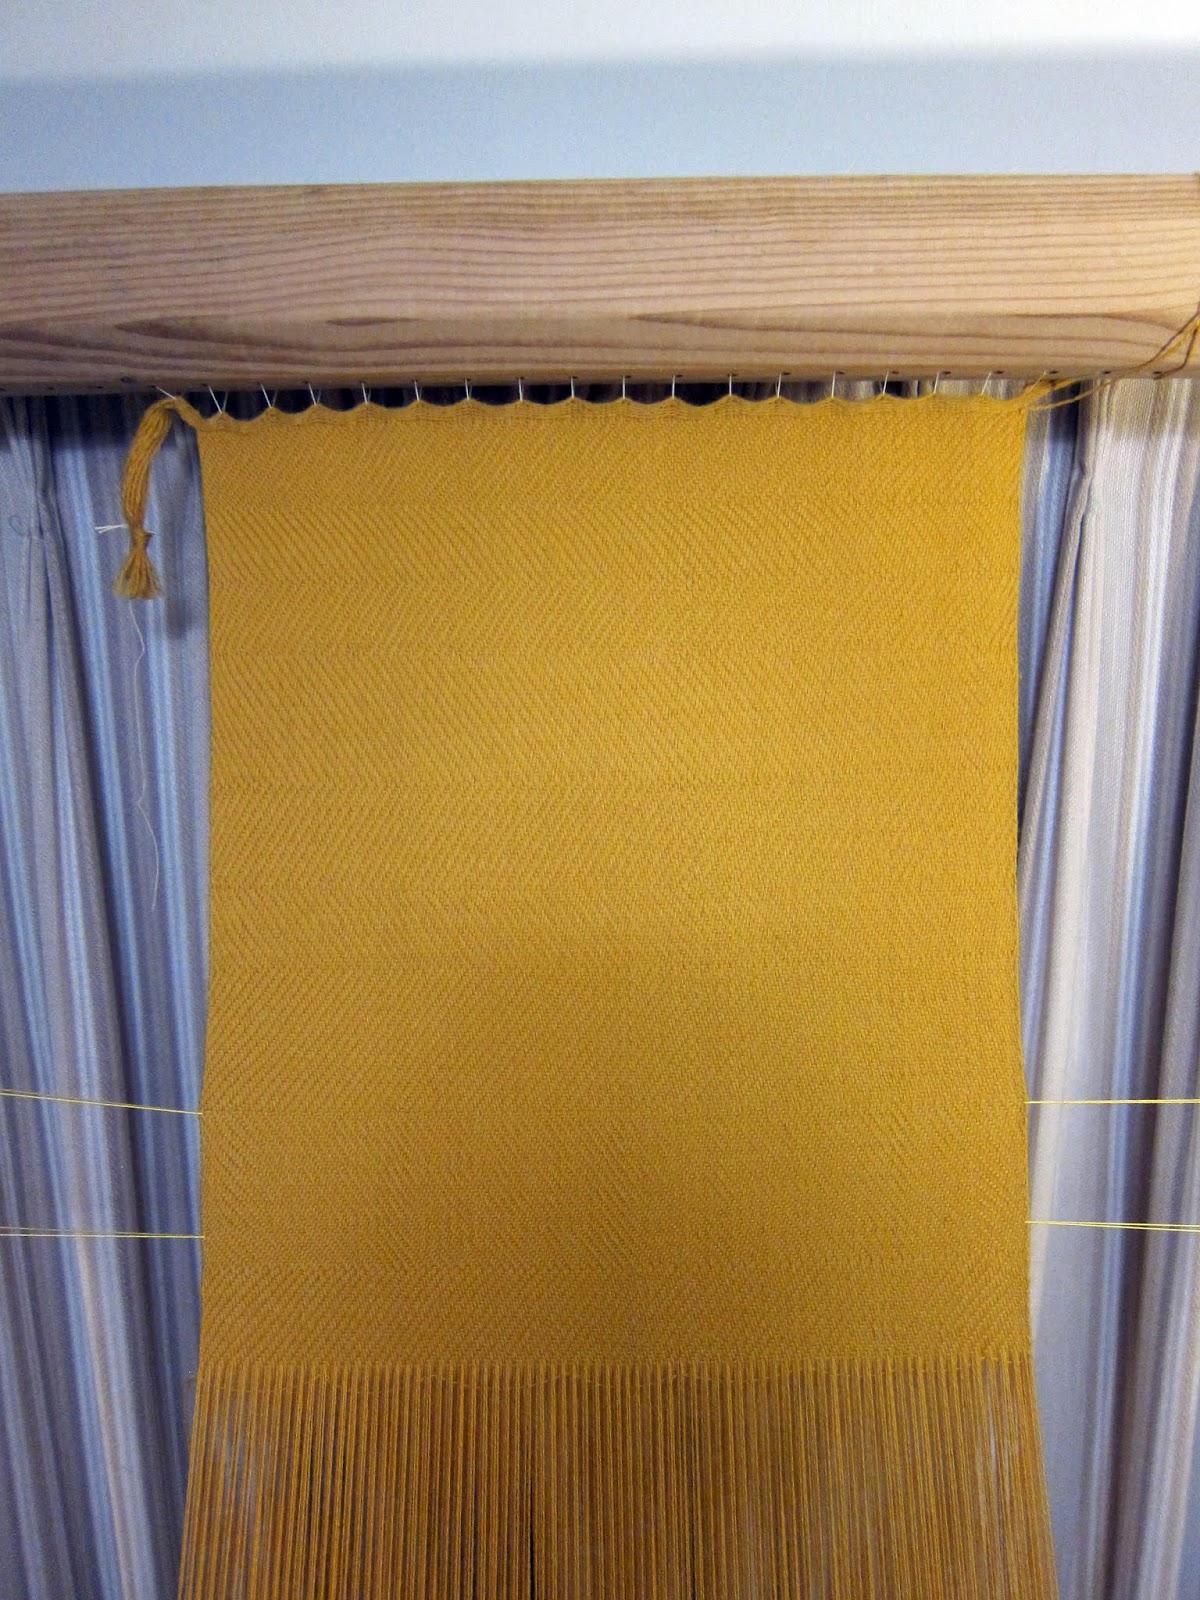
Figure 4: The first inch.

Figure 5: About halfway finished. The finished band is rolled up on the nearest rod.

Figure 6: Close ups from the top (left) and the bottom (right) of the band.

Figure 6 shows that the loops of the brocading wefts are at the underside of the band and lie pretty flat. This is a direct result of the particular treatment of the brocade wefts between successive picks as show in Figure 4. However, as you can see, occasional small kinks in the metallic threads are hard to avoid, so to protect the veil and/or forehead from the edges of the metal brocade, a strip of folded linen was sewn onto the under side of the brocaded band. Furthermore, I made the strip a little longer than the finished brocaded band so that it also serves to tie the band around the head. Figure 7 shows the finished headband as worn by Her Majesty just under the crown.

Figure 7: The finished headband as worn by the recipient.

Find a downloadable version of this post at: https://www.academia.edu/37766326/Gold_brocaded_headband_inspired_by_a_find_from_the_Shestovica_cemetery

Bibliography

Aislings Welt (2015) Shestovica cemetery, Chernigov, Ukraine http://aislingde.blogspot.com/2015/12/shestovica-cemetery-chernigov-ukraine.html (Last accessed: November 4th, 2018)

Collingwood, Peter (1982) The Techniques of Tablet Weaving, Echo Points Books & Media (Vermont)

Geijer, Agnes (1938) Birka III: Die Textilfunde aus then Gräbern, Kungl. Vitterhets Historie och Antikvitets Akademien (Uppsala).

Mikhailov, Kirill (2008) New finds of Viking Age textiles in Ukraine and Russia, Archaeological Textiles Newsletter 47, pp. 17-20.

Spies Nancy (2000) Ecclesiastical Pomp & Aristocratic Circumstance: A Thousand Years of Brocaded Tabletwoven Bands, Arelate Studio (Maryland).

Friday, July 6, 2018

Fabric for an Orkney Hood

I enjoy both weaving on a warp-weighted loom and tablet weaving. Looking for a new project I found information on the Orkney hood, an Iron or early Viking age hood with complex weaving and a double tablet woven trim with fringe. This intriguing garment had it all, so I set out to find more about it and setup to recreate a version for my wife. The fact that the cloth of the hood was woven in 2/2 herringbone twill made it extra interesting, since I have never woven this type of twill and there are few extant pieces using this type of weave aside from its use in leg wraps.


Historical background

The Orkney hood was found in 1876 in a peat bog in St. Andrew’s parish, Orkney. A detailed description of the original find was given by the experimental archeologist Jacqui Wood, who was commissioned to create an accurate reconstruction of the Orkney Hood by the National Museum of Scotland in 2002. The hood is a unique garment that combines a herringbone twill fabric for the hood with two tablet woven trims, one with fringe. The precise date of construction of the garment is unknown, but Audrey Henshall suggested that the hood was likely from the Iron or early Viking age. A more recent study comes to the same conclusion.

The whole garment is woolen, now a warm brown color with darker threads in the bands. The measurements of the hood are: middle forehead round to under chin 11 inch, point at crown to bottom of bands at back 19.5 inch, round shoulders 37.5 inch., length of fringe 11 to 12 inch; The hood is made up of three separate woven pieces. The cloth of the hood was a 2/2 herringbone twill weave with very erratic widths of the chevron stripes. The width ranged from 18 to 88 warp threads per stripe. The lower part of the hood consists of two tablet woven bands and the fringe. The upper band is 0.75 inch wide. It is hand sewn to the hood, the bottom edge is sewn to the upper edge of the lower band. The lower band is 2.75 inch wide, and from it hangs the fringe, which is an integral part of the band. The narrow, upper band consists of 23 threads of various color and thickness. The wide, lower band consists of 150 threads and required 50 tablets. It was woven with a mixture of light brown and dark brown threads. The fringe was formed from the weft of the lower band and thus an integral part of the band.

Reconstructed hood by Jacqui Wood.


Weaving the fabric

The current project only covers the weaving of the fabric for the hood; the tablet woven bands and assembly of the entire piece are a future project. The original hood is quite small and I had to enlarge all dimensions to make it fit my wife. Measuring required scaling all measurements with a factor of ca. 1.5, thus requiring a fabric of approximately 29 x 27 inch. Since this exceeded the width of my loom, I decided to weave a 13.5 inch wide strip of twice the length.

The reconstruction used single ply wool for the warp and the weft: a single thread for the weft and a double (unplied) thread for the warp. I setup the warp with 300 warp threads of store bought very loosely plied two-ply wool, which gave me a starting width of a little over 16 inch, enough wider to allow for the inevitable narrowing of the fabric during the first few inches of weaving and for shrinkage after washing. I unplied the same wool to get single ply thread for the weft. The chevron bands have a varying number of weft threads per band for a total number of picks of 392. This requires a weft count of a little over 13/inch or 5/cm, close to what I was getting in another project using the same wool. So even though I increased the size by about a factor 1.5, the total number of weft threads should end up being close to that of the extant piece. So I started weaving the fabric using the same sequence of herringbone bands as the original. After completing the entire sequence, the total length of the fabric was ca. 28 inch, very close to what was needed for the hood in the desired size. So I only added a single band of 24 picks to give a little margin for shrinkage. I then wove another complete sequence to get the other half of the fabric that I will need for the hood.

Creating the warp using a tablet woven starter band (left) and the finished heddles for 2/2 herringbone twill (right).


Tying on the loom weights (left) and the fully warped loom (right).


Close-up of the first inch of woven fabric.


Tying off the fringe at the end of the warp.


Washing and drying of the finished fabric.


Bibliography

Gabra-Sanders, T. (2001) The Orkney Hood, Re-Dated and Re-Considered, in Rogers, P. W., Jorgensen, L. B., and Rast-Eicher, A. (eds) The Roman Textile Industry and its Influence, Oxbow (Oxford).

Henshall, Audrey S. (1951-52) Early Textiles found in Scotland: Part One, Proceedings of the Society of Antiquaries of Scotland, Vol. 86.

Wood, Jacqui (2003) The Orkney Hood: an ancient re-cycled textile, in Downes, J. and Ritchie, A. (eds), Sea Change: Orkney and Northern Europe in the Later Iron Age ad 300-800 (Balgavies, Angus: The Pinkfoot Press), pp. 171-75
www.archaeologyonline.org/Documents/TheOrkneyHood.pdf

Tuesday, May 22, 2018

Warp-weighted loom weights: Their Story and Use


I wrote a research paper on warp-weighted loom weights for entry in the 2018 A&S Pentathlon competition at the Festival of the Passing of the Ice Dragon in the Barony of the Rhydderich Hael, A.S. 52.

Loom weights are the unmistakable evidence for the historic use of warp-weighted looms and their ample archaeological evidence gave the loom its name. This paper gives a brief discussion of the history of loom weights and the wide range of materials, shapes and weights that were found in archaeological excavations. I discuss the many aspects that affect the amount of tension that is needed or desired by each individual weaver and the way the organization of the loom weights affect the weaving.

The full manuscript can be downloaded from:
https://www.academia.edu/36693514/Warp-weighted_loom_weights_Their_Story_and_Use

Wednesday, April 25, 2018

Making bone tablet weaving tablets

I love tablet weaving and enjoy studying its use and history in addition to trying out the many different types of tablet weaving itself. Part of this invariably comes down to the question of what tools were used in historic times. Tablet weaving is a very popular technique for weaving narrow bands for belts or trim. It is a weaving technique that requires very little investment beyond the actual thread for the product itself, making it affordable for many of us. The only tools that are required are a set of tablets. You do not even need a loom to get started, your belt and a nearby doorknob or tree are sufficient to start weaving simple patterns. So this project focuses on the key ingredient that gives the technique its name: the tablets.


Historical background

It is hard to say when or where tablet weaving was invented. As Peter Collingwood so aptly says: “a distinction has to be drawn between the earliest known fabrics that could have been tablet woven and those which in all probability were so woven.” In his book, he presents a chronological list of the most important historical finds from the earliest ones in bog burials in modern day Germany dating back as far as the 6th century BC to the year 1000 AD, after which too much material survives to make a brief summary feasible. He also gives a brief history of the most important archaeological finds of tablets. Existing remains of historical tablets show that they were made from a variety of materials, including wood, bone, antler, ivory, bronze and leather. The earliest tablets that were identified as used in tablet weaving come from a cave at El Gigarrelejo in Spain. They were the charred remains of four or five beach wood tablets, 3.0 cm square with four large holes. Nancy Spies (2000) gives a detailed list of existing tablets based on the type of material that they are made of. Figures 1 and 2 give some examples of bone and wooden tablets of various shapes.

Figure 1: Several examples of bone tablets found at Jarlshof in Shetland, at the Broch of Burrian on North Ronaldsay in Orkney, at Harbour Broch at Keiss in Caithness, at Keil Cave in Argyll and at Tain in Ross-shire. They are dated between 200 B.C and 400 A.D. Their sizes range from 3.2 cm for the smaller round tablets to 4.4 x 5.0 cm for the largest triangular tablet.

Figure 2: Wooden tablets from Antinoë, Egypt dated to the 4th to 5th century A.D.

Arguably the most famous example is shown in Figure 3, a linen brocaded band with its warp still threaded to a set of 52 tablets, found in the Oseberg ship burial in Norway and dated to the 9th century A.D.

Figure 3: A set of threaded tablet weaving tablets found in the Oseberg ship burial in Norway.

Material and design

The inspiration for my project was a bone tablet with incised decorations found at Alchester, England. The excessive thread marks in the corner holes suggest that this tablet was mostly used with four threads, one through each corner. The decorations punctured by the holes along the left and right edge of the tablet and the absence of noticeable thread marks there suggest that these two holes were added at a later time.

Figure 4: Bone tablet found at Alchester England; Roman (Asmolean Museum, Oxford).

These types of bone tablets were most likely made from the shoulder blades of domestic or hunted animals. Shoulder bones have a relatively flat and thin central part that is very suitable to making tablets. Since I had deer shoulder blades available to me, I decided to make the tablets from deer bone. As discussed below, I simplified the design a little due to the thinness of the central part of the shoulder bone. I decided to only incise single circles at the same locations as the double circles in the extant piece and to omit the others.

Making the tablets

The first tablet I made was a bit of a learning curve. I wanted to use tools that are as close to period as I can and we recently bought from Deagrad Tools in Sheffield, England, several hand forged ring and dot augers and a hand forged comb makers hacksaw based on the Mästermyr find (Gotland, Sweden, ca. 1000 A.D.). I started out with cutting off the thick piece of the shoulder bone with the hacksaw and that proved to be a mistake. Although the saw is specifically designed to saw through bone and antler, it proved too coarse for the much more delicate shoulder bone. When I was almost through, the thinner flat central part of the shoulder bone fractured due to the stress of the sawing action. There was still enough left to make one small tablet, but since the structure of the remaining part was already severely compromised I finished cutting it to size with a modern band saw.

I do not have period augers or spoon drills, so I experimented a bit with drilling holes in one of the leftover pieces by positioning the sharp point of a knife at the correct location for a hole and rotating the blade clockwise and counter clockwise under slight downward pressure. This proved surprisingly efficient and I had scraped out a nice round hole in no time. The edge and the rounded corners were shaped and smoothed using a modern file as a substitute for a period one (another item still on my tool wish list). The end result was a 3.5 cm square tablet with a hole in each of the corner (see Figure 6 on the right). Although a bit smaller than intended, well within the size range of bone tablets found in Roman Britain between the 1st and 4th century A.D.

Figure 6: The first completed tablet (undecorated).

Having learned from the earlier mistakes, I decided to try and make a second tablet without having to resort to a modern band saw. I cut a triangular slot from a board to support the thick parts of the shoulder blade. I then positioned the shoulder blade over the slot allowing me to cut out the thin flat center piece of bone with a fine dovetail saw (see Figure 7 below).

Figure 7: A saw jig to cut out the thin flat center piece from a shoulder blade.

This proved much more successful and I ended up with a nice thin and relatively flat triangle of bone large enough to cut a 4.2 x 4.2 cm square tablet. I then rounded off the corners, smoothed the edges and drilled the four holes in the same way as for the first tablet.

The final task was adding the incised decorations that drew my eye to the particular tablet found at Alchester, England (Figure 4 above). I first tried carving two concentric circles in a leftover part with two ring augers designed specifically for this task, a small one to carve the inner circle and a larger one for the outer circle. This immediately showed me that the larger auger created a center hole that would easily puncture completely through the thin bone tablet. So I decided to decorate the tablet only with smaller single circles at the same locations as the larger concentric double ones in the extant piece. I furthermore dispensed with the four additional smaller ones on the diagonals. The end result is a nice looking and fully functional bone tablet.

Figure 8: Cutting the tablet to size, rounding the corners and smoothing the edges, drilling the holes, and adding the decorations.

Learning points

Working with bone was an interesting new experience. It is much more fragile than I expected and has to be worked with care when using hand tools. Suitable tools make all the difference and the period hacksaw that we own proved too coarse for the task at hand. A modern, much finer dove tail saw was the solution, so I guess that just got added to my shopping list for period tools.

Find a downloadable version of this post at:
https://www.academia.edu/36500576/Making_bone_tablet_weaving_tablets

Bibliography

Arwidsson, Greta and Berg, Gosta (1999), The Mästermyr Find: A Viking Age Tool Chest from Gotland, Larson Publishing Company (Lompoc, CA)

Christensen, Arne Emil, and Nockert, Margareta (2006) Osebergfunnet – Bind IV Tekstilene, Museum of Cultural History (Oslo, Norway).

Collingwood, Peter (1982) The Techniques of Tablet Weaving, Echo Points Books & Media (Vermont).

Gillis, Carole, Nosch, Marie-Louise B. (ed.) (2003) Ancient Textiles: Production, Craft and Society. Proceedings of the First International Conference on Ancient Textiles, The Danish National Research Foundation Centre for Textiles, Oxbow Books (Oxford & Philadelphia).

Riley, Dennis (2014) Anglo-Saxon Tools, Anglo-Saxon Books, Lightning Source (Australia, England, USA).

Spies, Nancy (2000) Ecclesiastical Pomp & Aristocratic Circumstance - A Thousand Years of Brocaded Tabletwoven Bands, Arelate Studio (Maryland).

Tuesday, April 24, 2018

A 14th century Italian inspired greenbelt

I was asked by a friend within the SCA to weave a greenbelt for her prospective apprentice with a 14th century Italian persona and a research interest in medieval ornithology. So the search for suitable extant pieces from roughly the right time frame and geographic location began. Given her research interest I started looking for tablet woven bands with bird motifs. I found several appealing pieces that could be patterned for brocading and ended up using two of them. One inspired by a band patterned with peacocks and another from an intricately brocaded ribbon fragment with interesting geometrical patterns.


Historical Background

Finding tablet woven examples of extant pieces of band from the right time frame and geographic location proved to be somewhat non-trivial. I was only able to find evidence for a small number of fragments of tablet woven bands that are identified as Italian and dated to the neighborhood of the 14th century AD and none of them with bird motifs. Extending the search to brocaded fabrics with bird motives was more successful and one in particularly caught my attention: a silk fabric fragment in the collection of the Museum of Fine Arts in Boston with bands patterned with a row of peacocks facing each other in pairs (Figure 1).

Figure 1: Fragment with band patterned with peacocks.

The museum describes the medium and technique as “silk with alternating bands of weft patterned plain weave (draps d'areste), samite, and plain weave.” The fragment is classified as Italian or Spanish and dated to the 13th – 14th century AD.

The other piece that captured my eye was a fragment of a brocaded ribbon, classified as Italian and dated to the 13th – 14th century AD (Figure 2).

Figure 2: Fragment of a brocaded ribbon.

Technique, material and design

I decided to weave a brocaded band for three reasons: firstly, the fact that the most suitable fragment of tablet woven band was a brocaded ribbon (Figure 2); secondly, the relative ease of designing and brocading arbitrary motifs makes is possible to pattern the peacocks from the band in Figure 1; and thirdly, I simply enjoy brocading.

The first step in designing the belt was creating a pattern for the peacocks suitable to brocading. The extant piece is described as draps d'areste or cloth of aresta. Sophie Desrosiers et al. discuss a number of characteristics shared by cloths of aresta  among which one is a pattern repeat of two units, one straight and one reverse, and another is the characteristic herringbone pattern so evident in the close-up of the band in (Figure 3) which gives the cloth its name (arista is Latin for an ear of corn, but was also applied to a fish bone).

Figure 3: Close-up of the band with the peacocks.

The close-up of the band with the peacocks was loaded into Photoshop and viewed at varying pixel resolutions to arrive at a good compromise between the quality of the image and the number of pixels across the width of the band. The resulting pixilated image served as the basis for the brocading pattern for the peacocks. The band with the peacocks was woven in silk. The thread used to weave the brocaded ribbon was not specified in the catalogue information, but it is a reasonable assumption that such an intricate ribbon would have been woven in silk. So I decided to weave the belt in silk as well with its high strength and beautiful appearance as a welcome bonus. A previously brocaded belt in 20/2 silk taught me that I should expect a warp count of about 56/cm. With 37 tablets for the pattern and 3 on each side for the stave borders (as drawn in Figure 4) this should result in a width of about 3 cm, which was close to the width desired by my friend. So I settled on 20/2 silk for the warp and a total width of 43 tablets.

Figure 4: Brocading pattern of the peacock.

Next, I created a sequence of geometrical patterns inspired by the extant piece of brocaded ribbon in Figure 2 and used that to define the ends of the belt in a similar fashion as the often used metal end tips on a leather belt. However, the extend piece is only 8 mm wide and woven on 25 tablets for a warp count of 125/cm. Thus not only is the number of tablets almost twice as small as the 43 that was settled on above, the warp count is also a little more than twice that what I would expect for 20/2 silk. Clearly the warp thread in the extend piece is much thinner than what I plan to use for the belt. I therefore scaled the pattern to fit on the same 37 tablets with an additional 3 for the stave borders on each side to match the pattern for the peacock motif.

Figure 5: Brocading pattern for the end tips of the belt.

Weaving the belt

The band was woven on a warp weighted tablet weaving loom that I designed and build for an earlier project. The loom is designed to use on the top of a table, with the warp ends weighted down and dropping freely over the fixed rod at the end of the loom. The other end of the warp is attached to a ratcheted rod, which stores the finished band. The length of the finished band needed to be ca. 80 inch (including fringes). I warped the loom with a 135 inch long warp, allowing for losses at the start and end and for shortening due to twist. This was more than enough to create the required length of band, a sample for future reference and some room for testing. During weaving, the initial surplus length of warp was braided or looped to keep the warp ends suspended freely above the ground.

The warp was created one tablet at the time, threading back and forth twice per tablet. The tablets were warped alternating S and Z (to eliminate fouling of the warp threads during turns), mirrored with respect to the center. After warping the loom, I experimented a bit with warp tension and the thickness of the weft threads to get a roughly square pattern. As is common for brocaded bands, I used a thinner structural weft thread (60/2 silk), which helps in getting a tighter more well defined pattern. After some experimenting, I decided to use three 60/2 silk threads combined (not plied) for the brocading weft instead of the more typical single 20/2 silk thread (the same thread as the warp). I found this to give a smoother more even pattern and a better overall look of the motifs. Note that using multiple thinner threads was commonly used when brocading with silver or gold threads to get more even coverage, so using the same idea in this project has historical merit. I ended up using one individual weight of ca. 31 gram (a little over 1 ounce) tied to the four thread of each tablet, resulting in a tension of ca. 8 gram/thread.

The brocading weft was passed under two of the four threads of the cord creating a smooth and uniform underside. As in the original bands, all cards are collectively rotated forward one quarter turn for each successive passage of the ground and brocading weft. The unfinished warp ends were periodically untwisted to eliminate the build-up twist. The finished band was collected on the ratcheted rod at the near end of the loom. The braids at the end of the warp that stored the surplus warp were periodically unbraided to feed more warp while keeping the weights freely suspended.

A test weave of a brocaded peacock gave me a pattern length in the warp direction of ca. 1¾ inch or a weft count of ca. 22/inch. Assuming the same weft count for the end tip patterns gives an end tip length of ca. 4¾ inch, very similar to the length of a pair of peacocks with about an inch between them. This led me to a design of peacock pairs separated by a space between them that is roughly equal to that of a pair itself, such that they appear evenly spaced along the band. Two additional requirements were a target length without fringes of 75 inch and a design that was symmetric with respect to the middle of the band. These design requirements can be met with seven peacock pairs with 4⅜ inch between each pair and ⅞ inch between the two peacocks within a pair. This design was matched well once weaving was completed. The end tips ended up being a little shorter at about 4½ inch each, but the other elements where very close to the designed values. The total woven length was essentially the same as the target length of 75 inch. I added 3 inch of fringe at each end for a total length of 81 inch.


Find a downloadable version of this post at:
https://www.academia.edu/36492594/A_14th_century_Italian_inspired_greenbelt

Bibliography

Burchardt, Silvester (2016) Who’s afraid of brocade (class handout)

Collingwood, Peter (1982) The Techniques of Tablet Weaving, Echo Points Books & Media (Vermont)

Desrosiers, Sophie, Vial, Gabriel, and De Jonghe, Daniël (1989) Cloth of Aresta. A Preliminary Study of its Definition, Classification, and Method of Weaving, Textile History, Vol. 20 (2) pp. 199-223.

Spies, Nancy (2000) Ecclesiastical Pomp & Aristocratic Circumstance - A Thousand Years of Brocaded Tabletwoven Bands, Arelate Studio (Maryland).

Tuesday, March 6, 2018

Warping my warp-weighted tablet weaving loom

So far I have done all my tablet weaving on a warp-weighted loom that I built myself, where the warp tension is maintained by gravity. The near end of the warp is wound around a horizontal rod, which is locked in place between each readjustment of the warp (in my case by a ratchet at one end of the rod). The far end is hanging freely over a second horizontal rod mounted at the end of a wooden board, suspended by a single weight for each cord (the set of threads through all the holes of a single tablet). This warp-weighted tablet weaving method has several advantages. The warp tension is very nearly constant during weaving and the weaver has a lot of control on the amount of tension by using different weights. Surplus warp can be braided before tying each cord to its weight giving a lot of flexibility in the total warp length. Buildup twist can be removed easily without untying the weights or removing the warp from the loom. This facilitates weaving designs or using techniques that are not twist neutral without the need to change the turning direction of the tablets periodically (which often leads to a discontinuity in the pattern or a visible change in the surface texture). One big downside that I have found so far is that traveling with a warped loom is challenging.

Peter Collingwood (2015) discussed several ways of warping the loom. I picked the one that I think is the easiest to learn. The idea is illustrated for tablets with four holes. Clamp the loom in place on a table on one side along the long direction and clamp two boards with pegs at the other end. Start by going through one of the holes of the first tablet, loop around the horizontal rod near the weaver and go in the opposite direction through the second hole. Keep pulling the thread and wind around as many pegs as needed to get the required warp length. End by tying it to the last peg. Follow the same track around the pegs with the other end and cut and tie it around the last peg as well. Repeat for holes three and four and so on for the remaining tablets.


After completing the warping, surplus warp can be braided such that (after tying on the weights) the ends of the cords hang freely just above the ground.


Complete the warping by rotating the loom such that the warp ends hang freely and tie on the weights, one at the end of each cord.


After weaving for some time and collecting the woven band on the rod nearest to the weaver, the weights will reach the level of the table. That is the time to feed more warp by loosening part of the braid.


The most important part to remember is to always pass all threads through the holes from the same side of the tablet as seen from one end otherwise the tablets will not turn!

In photographs:


The layout of the warping setup with the first three tablets warped. If you need a longer warp, you can go back and forth around more pegs.


The first three tablets, from left to right threaded as “S”, “Z”, and “S”. Clamp the tablets in place after warping is complete.


After braiding the cord such that the end will hang just above the ground (left and center) and after tying on the weights, one at the end of each cord (right).


A completely warped loom.

Find a more detailed class handout about brocading on a warp-weighted loom at:
https://www.academia.edu/36023034/Basic_Beginner_Brocading

Bibliography

Collingwood, Peter (1982) The Techniques of Tablet Weaving, Echo Points Books & Media (Vermont)

Wednesday, January 17, 2018

Tabletwoven laurel leave trim

My wife received her writ for induction into the Order of the Laurel, the perfect excuse to weave something with laurel leaves. She has a Viking under dress that could use trim, so I was thinking of a relatively narrow tablet woven band for the cuffs. I wanted to try tablet weaving with linen and since this is a linen under dress, I thought linen would be more appropriate than silk. The band ended up being about 2 cm wide, a bit wide for cuff trim, so it may end up becoming apron dress trim. Ah well, it was a fun project and an interesting new experience. I found the linen to weave pretty easy and not nearly as stiff as I expected. It is true that there is very little elasticity in the fiber, but that is I think much less relevant when using a warp weighted tablet weaving loom, since uneven tension is almost eliminated by using an individual weight for each tablet.

I wanted to design the pattern myself to make it a unique gift, so I downloaded a nice looking laurel leave from the internet. I loaded it in Photoshop, copied and mirrored it, and played a bit with the width to get a number of pixels that gave what looked like a reasonable resolution and number of tablets combination. I ended up with 29 pixels or tablets.

A single laurel leave (left) and a string of three identical ones (right).

The laurel leaves string after reducing the resolution to a width of 29 pixels.

I took two tablet weaving classes on double faced 3-1 twill at the most recent FFF event: a hands-on class and a pattern designing class. That to me was a good enough reason to give it a try, but what decided it was the technique's ability to create well defined solid areas in a single color with smooth transitions along the diagonals. Given the width of 29 tablets and the pixilated figure of a couple of laurel leaves, I set out to draw a weaving diagram on brick paper. The first attempt had 14 picks along a cord across the leave and 8 between the leaves, but after weaving the first leave it was clear that the pattern was much more elongated than intended. I reduced it to 10 picks along the leave and 6 between them and that looked much more natural. I wanted a design with a branch starting at each end of the band and growing towards the center, so after finding the base repeating pattern satisfactory, I designed the transition in the middle where the two branches from either end meet. A slightly smaller terminal leave completed the design.

The start of the pattern with the repeating section between the two lines in the top border. The same pattern in reversed other is used for the second half of the band.

The transition in the middle of the band.

I use a warp weighted tablet weaving loom that I designed and made myself. I like the level of control of the tension, the flexibility in warp length and the ability to simply take out build-up twist very appealing to warp weighted weaving. The rod at the front of the loom is freely rotating with a ratchet to lock the rotation. The other rod is fixed and the cords simply hang over the end. The warp tension is maintained by weights tied to the end of the cords. If the warp is too long, the cords are braided and the weight is tied to the braid.

My tablet weaving loom.

The loom was warped with a total of 33 tablets, two selvage tablets on either side with brown threads in all four holes and 29 tables for the pattern section with two yellow and two green threads per tablet. The same brown was also used as weft. Single ply 16/1 Bokens linen was used for all threads. All cards were S-threaded, except the rightmost two selvage cards, which were Z-threaded. Constant tension was maintained by hanging weights at the end of the warp, a single 25 gram weight per cord. The selvage cards were always turned forward and the build-up twist was periodically removed. I used the one-pack method for 3-1 twill as described by Peter Collingwood. Two bands were woven, one of 17 inch and one of 12 inch.

The first inch (top), halfway (middle) and the finished bands.

After completing the bands I found Guntram's Tabletweaving Thingy and learned just enough to reproduce the pattern in GTT. Hopefully that makes for a more suitable medium to share the pattern with others. Anyone interested please feel free to ask!

The design pattern (top) and the weaving image (bottom) from GTT.


The linen was bought online  from Vävstuga:
http://store.vavstuga.com/category/yarns.html


Bibliography

Collingwood, Peter (1982) “The Techniques of Tablet Weaving”, Echo Points Books & Media (Vermont).

Gold brocaded headband inspired by a find from the Shestovica cemetery; Second half 10th century AD, Chernigov, Ukraine

I was looking for a project to try something new with tablet weaving: brocading with metallic thread. A headband as part of the Wardrobe Pro...